How to Cut Curtain Bangs have a special charm. They frame the face softly, part naturally in the middle, and suit almost every hair type. Their popularity stretches from the ‘70s icons like Brigitte Bardot to modern-day celebrities.
The best part? They grow out gracefully, making them a low-commitment fringe option. But cutting them yourself takes a mix of patience, the right tools, and a little confidence.
Gathering the Right Tools
Your tools make or break the outcome. Swap out kitchen scissors for professional hair-cutting shears—they cut cleanly without splitting ends.
You’ll also need a fine-tooth comb for precision, a few sectioning clips to keep other hair away, and a spray bottle with water if you prefer a slightly damp cut.
Optional but useful: thinning shears for thick hair or a round brush for styling afterward.
Prep Your Hair First
Start with clean, dry hair if you have waves or curls, or slightly damp hair if your hair is straight.
Dry hair lets you see exactly where the bangs will fall, preventing the “too short” mistake caused by shrinkage when curls dry.
Comb out any tangles and part your hair right down the middle before you begin.
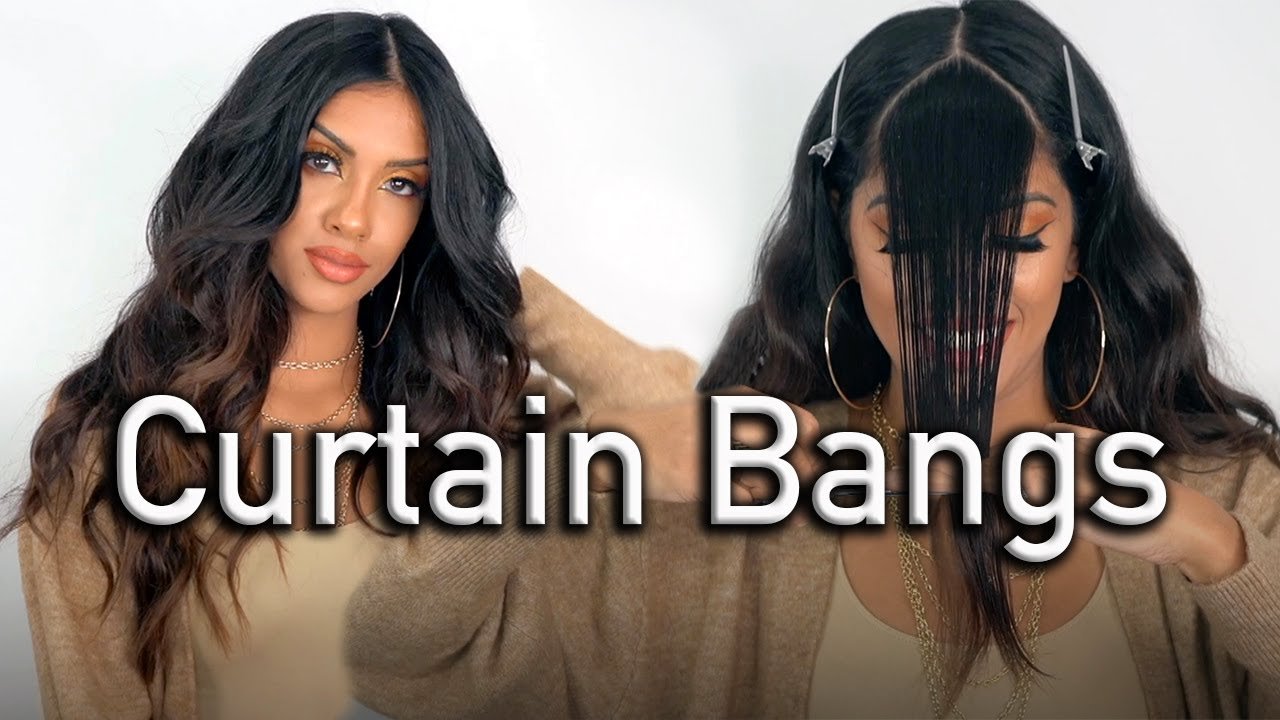
The Triangle Section Trick
Curtain bangs are all about strategic sectioning
Using your comb, create a triangle-shaped section at the front of your head—the point starts at the top of your head, and the base runs from one eyebrow arch to the other
Clip the rest of your hair back so you’re only working with this small, focused section.
Divide for Better Control
Divide your bang section into three parts: the center, the left, and the right.
Working in smaller chunks makes it easier to achieve symmetry and avoid cutting too much at once.
The center section will become the shortest part of your bangs, while the sides taper longer toward your cheekbones.
Start Longer Than You Want
This is the golden rule: you can always cut more, but you can’t put hair back.
Begin with your fingers holding the center section at the bridge of your nose or slightly lower.
Cut just below your fingers using small, upward snips—this avoids harsh, blunt lines.
Shape the Curtain
Once the center is trimmed, move to one side.
Angle your scissors so that you cut downward, following the slope from the center toward the outer edge of your bangs.
Repeat on the other side, making sure both angles mirror each other for a balanced, curtain-like flow.
Point-Cutting for Softness
To avoid a “helmet” look, finish with point-cutting.
Hold your scissors vertically and make tiny snips into the ends of the bangs.
This texturizes them, softening the edges and helping them blend into the rest of your layers.
Style to See the True Shape
How to Cut Curtain Bangs, blow-dry your bangs using a round brush.
Roll the brush under and away from your face while aiming the dryer downward—this creates that signature swoop.
If you spot any uneven sections, now’s the time to make small adjustments.
Maintain Your Curtain Bangs
Curtain bangs need a trim every 4–6 weeks to keep their shape.
Between trims, you can freshen them up by point-cutting just the tips.
Wash them more often than the rest of your hair—they sit on your forehead and tend to get oily faster.
Common Mistakes to Avoid
- Cutting too much at once: Always work in small increments.
- Skipping the sectioning: Without a triangle section, the bangs won’t frame your face correctly.
- Forgetting your natural hair pattern: Curls, cowlicks, or waves can shift your bangs higher or to one side once dry.
- Ignoring blending: If the bangs end abruptly, they can look awkward.
Quick Fixes for Slip-Ups
If you accidentally cut them too short, style them to the side or use clips until they grow out a bit.
Flat-ironing them straight down can make them look longer.
And remember—hair grows about half an inch per month, so mistakes aren’t permanent.
Styling Variations
Curtain bangs are versatile.
You can wear them parted straight down the middle for a classic look, or sweep them to one side for a softer feel.
On lazy days, they blend easily into ponytails or buns, adding instant style without effort.
The Confidence Factor
How to Cut Curtain Bangs can be intimidating, but it’s also empowering.
By following a careful, step-by-step process and using the right tools, you’ll build confidence in your own hair skills.
Plus, you’ll save time and money on salon visits for simple fringe maintenance.
Quick Step Summary
- Gather tools: Shears, comb, clips, spray bottle.
- Prep hair: Dry or slightly damp, parted down the middle.
- Section: Triangle shape from eyebrows to crown.
- Divide: Center, left, right.
- Cut center: Start longer than desired.
- Shape sides: Angle scissors downward.
- Point-cut: Add texture and softness.
- Style: Blow-dry with round brush.
- Maintain: Trim every 4–6 weeks.
Final Thoughts
Curtain bangs are one of the easiest fringe styles to maintain at home when cut carefully.
They suit a variety of face shapes, work with many hairstyles, and can be adapted for both casual and polished looks.
If you go slow, respect the “start long” rule, and take your time styling, you’ll walk away with bangs that look salon-fresh—without the regret.
FAQ’S
1. Can I cut curtain bangs if I have curly hair?
Yes—but always cut them dry so you can see your true curl pattern. Start longer than you think you need, as curls spring up more once cut.
2. How do I know if curtain bangs will suit me?
They flatter most face shapes. Adjust the length so the shortest part hits near your cheekbones or eyes, and taper the rest for balance.
3. What if I cut them too short?
Don’t panic—style them to the side, use bobby pins, or blend them into layers while they grow. Hair grows about half an inch per month.
4. How often should I trim curtain bangs?
Every 4–6 weeks is ideal. Light touch-ups in between help keep the shape fresh without a full recut.
5. Do I need special scissors for this?
Yes—use sharp hair-cutting shears. Household scissors can cause frayed ends and uneven lines.


